What you need to know about Windows 10’s Game DVR feature
Microsoft's operating system Windows 10 ships with game DVR capabilities that some Windows users can make use of to record in-game videos.
Some users? The company made the decision to restrict the feature based on the installed hardware. More precisely, based on the installed video card.
According to Microsoft, game DVR capabilities are only available if the following video cards are installed in the machine.
- AMD Radeon HD 7000 series, HD 7000M series, HD 8000 series, HD 8000M series, R9 or R9 series.
- NVIDIA GeForce 600 or higher, Geforce 800M or higher, Quadro Kxxx or higher
If another video card is installed Game DVR capabilities are not available. While Game DVR information may still be displayed on launch of games on the system, actual game recording is blocked when the game bar is opened. You may however capture screenshots using the application.
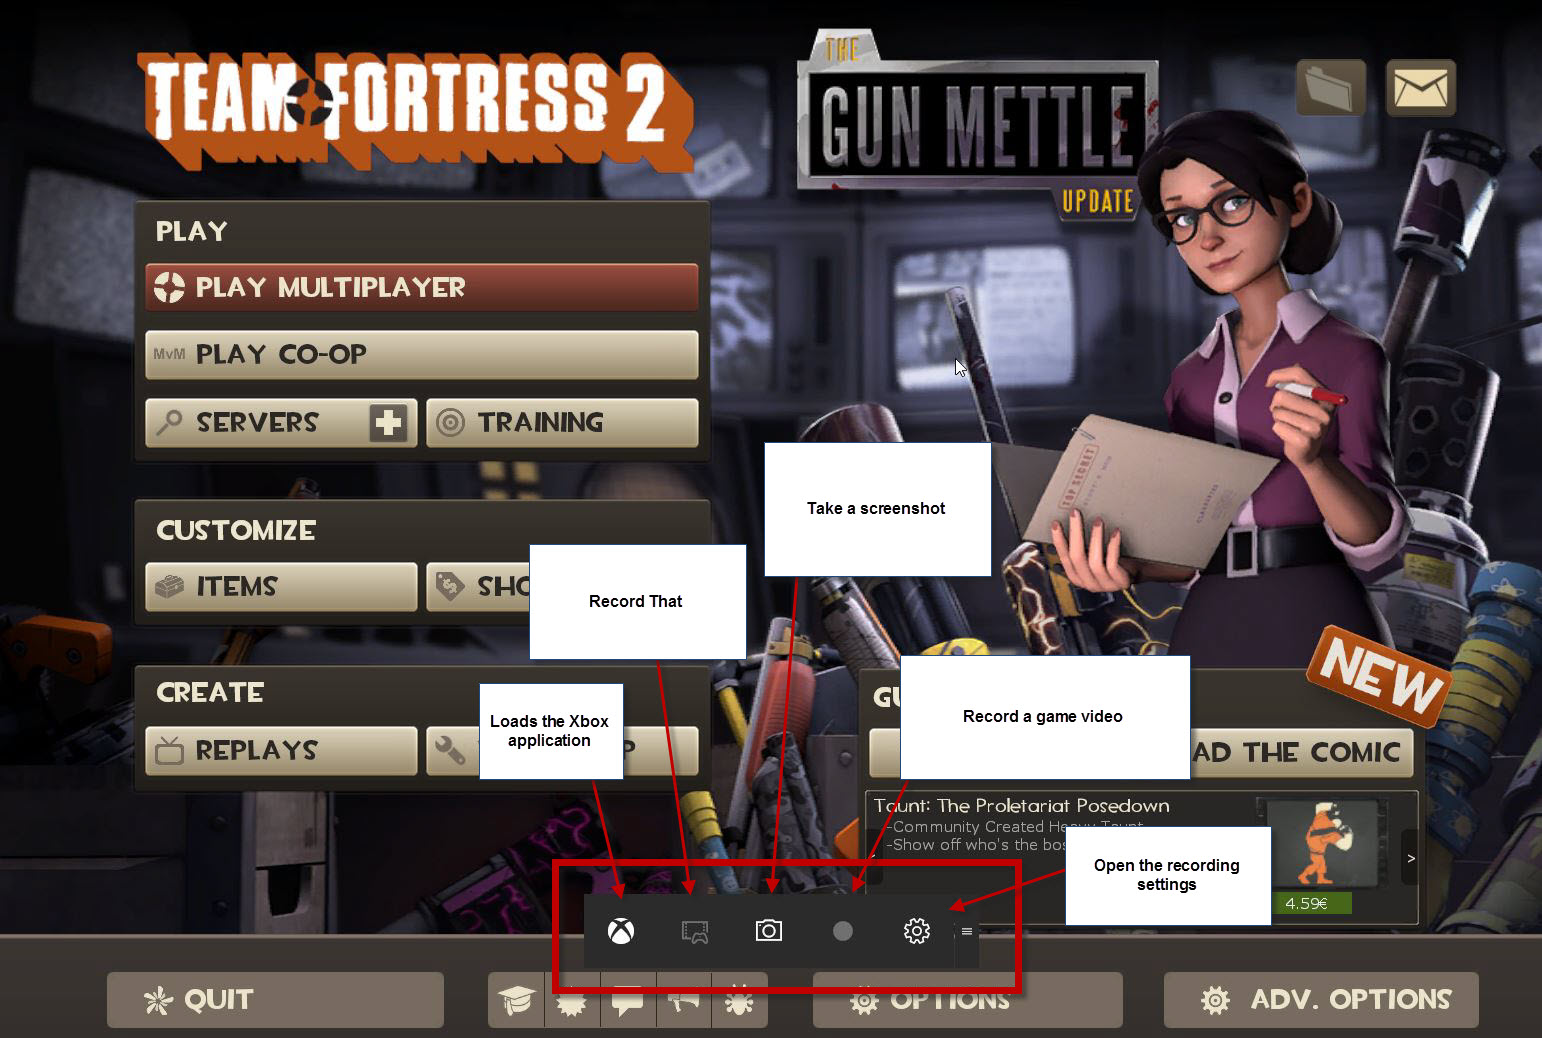
You may still use the game bar to create screenshots of games but the recording of games is not available.
There is another limitation that may prevent you from using the feature even if your PC meets the requirements.
You may not see the Game Bar while playing games. This happens sometimes when you run games in full screen.
Even if you use Windows-G to display it, it won't show up because the fullscreen window overshadows it.
The only fix for this right now is to run the game in windowed mode instead. Once you do that, you will notice that the bar is displayed so that you can use its functionality.
If your PC meets the requirements to record games, you may want to configure it properly before you start doing so.
Configuring Game DVR on Windows 10

The capabilities are provided by the Xbox application.
- Tap on the Windows-key, type Xbox and launch the Xbox application. It is installed by default on Windows 10 systems and should be listed in the results as a consequence.
- Select the menu icon (three horizontal lines) at the top and then Settings.
- Switch to Game DVR when the settings open.
There you find the following related options:
1. Change existing keyboard shortcuts
The following keyboard shortcuts are used by default:
- Windows-G opens the Game Bar
- Windows-Alt-G Record that feature that records the previous 30 seconds of gameplay
- Windows-Alt-R starts or stops a recording
- Windows-Alt-PrintScn takes a screenshot
- Windows-Alt-T shows or hides the recording
2. Background recording
One interesting feature that Game DVR offers is background recording. This records the game continuously and allows you to start the recording 30 seconds earlier.
Handy if you just experienced something that you want recorded but forgot to start the recording.
This will affect game performance due to the fact that games are recorded continuously on the system.
3. Recording related settings
These settings allow you to change various recording related settings, for instance in regards to quality.
- Change the maximum recording time.
- Select the folder you want the game videos to the saved to. The default location is set to the account's Videos\Captures folder on the drive Windows is installed on.
- Select the desired video quality and resolution, and audio quality.
Alternatives
You may use alternatives such as MSI Afterburner instead to record game videos if your machine is not compatible with Game DVR on Windows 10.
This article was first seen on ComTek's "TekBits" Technology News

- Log in to post comments