How to remove cloud features from Office 2013
If you are using Microsoft's most recent desktop version of Office, Office 2013, you may have noticed that the company has integrated several cloud features in it.
You can sign in to your OneDrive account to load and save documents to it for example. While that may be useful for users who make use of the functionality, it is not really needed if you never plan on using it.
The feature is displayed to you even if you never plan to use OneDrive or any other cloud hosting service.
The following guide provides you with the means to remove the features from Office 2013 so that they are not shown anymore to you.
There are two ways to do this: the first adds a new entry to the Windows Registry, the second makes use of the Group Policy Editor.
Turn off the cloud features in Office 2013 using the Registry
This method can be used on all systems running Office 2013 which should make it the preferred method in most cases. Here is what you need to do:
- Tap on the Windows-r keys on your keyboard. This opens the run box.
- Type regedit in it and hit enter. This opens the Windows Registry Editor.
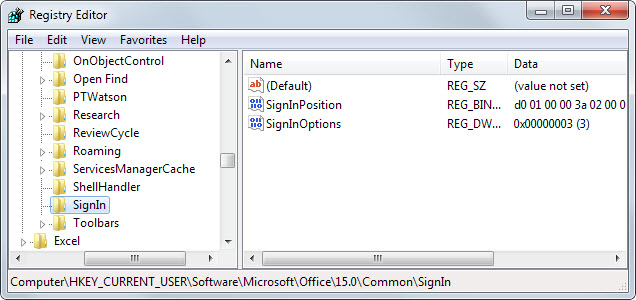
- Use the key structure on the left to navigate to the following key: HKEY_CURRENT_USER\Software\Microsoft\Office\15.0\Common\SignIn
- If SignIn does not exist, right-click on Common and select New > Key, and name it SignIn.
- Right-click on SignIn afterwards and select New > Dword (32-bit) Value from the context menu.
- Name the entry SignInOptions.
- Double-click it afterwards and set its value to 3. This turns off the cloud features.
To enable the cloud features at a later point in time delete the SignInOptions key again.
Using the Group Policy Editor instead
The Group Policy Editor is only available in professional versions of Windows which means that you cannot make use of this method if you run a Home or Basic version of Windows.
A second requirement is that you need to download and install the Office 2013 Administrative Template files.
- Hit the Windows-r keys again to open the run box on the system.
- Type gpedit.msc and hit enter. This opens the Group Policy Editor.
- Navigate to the following tree: Local Computer Policy > User Configuration > Administrative Templates > Microsoft Office 2013 > Miscellaneous.
- Locate "Block signing into Office" in the list and double-click the entry.
- Select Enable from the window that opens up and "none allowed" to disallow the sign-in.
To revert the change, change the policy to not configured.
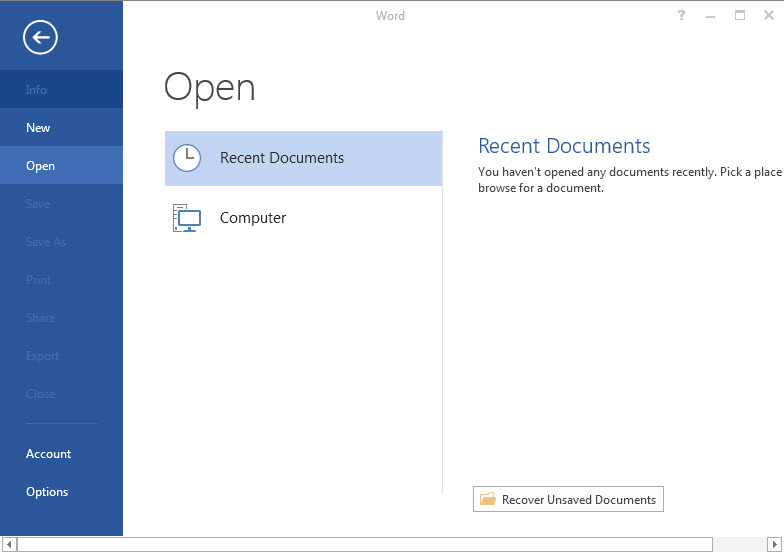
The Effect
Here you see how the open dialog looks like after you have made the change.
This article was first seen on ComTek's "TekBits" Technology News

- Log in to post comments