How to disable Windows 10 Live Tiles permanently
The following guide walks you through the process of turning off Windows 10 Live Tiles permanently.
I have no use for Live Tiles and explained my reasoning previously here on Ghacks. First, I don't really use many applications as I prefer desktop programs over them for a variety of reasons.
But even for applications that I use, I find live tiles to be a hindrance if not an annoyance rather than something that is beneficial.
I can see them work well on mobile devices but not so much on the desktop.
This might change for the better with the introduction of interactive live tiles, a feature first showcased in 2014 but never heard of again afterwards.
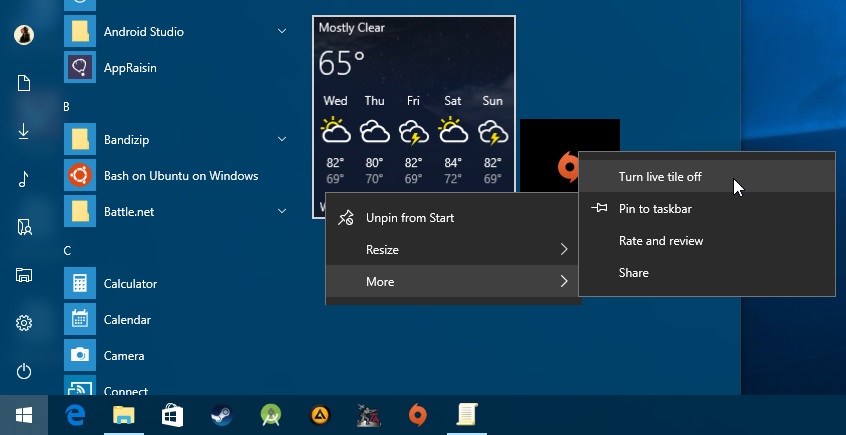
It is easy enough to turn off the live tile feature for individual applications. Simply right-click on the tile in the Windows start menu, and select More > Turn live tile off to do so.
But that takes only care of that single tile and not all of them. If you have no use for them, you may want to consider turning the feature off completely instead so that newly installed applications won't make use of the feature.
Disable Windows 10 Live Tiles
You have two main options to turn off Live Tiles completely in Windows 10. You can use the Group Policy Editor and configure a policy for individual user accounts, or use the Windows Registry instead.
Group Policy
The Group Policy is not available for all editions of Windows 10. Basically, if you run a Home version, Group Policy Editor is not accessible by default and you need to use the Registry hack below to turn off live tiles.
For those with Group Policy, the process looks like this:
- Tap on the Windows-key and wait for the Start Menu to open. Watch all the Live Tiles in their glory, if you have not turned them off yet manually.
- Type gpedit.msc and hit enter.
- Confirm the UAC prompt that appears. The Local Group Policy Editor should be open now.
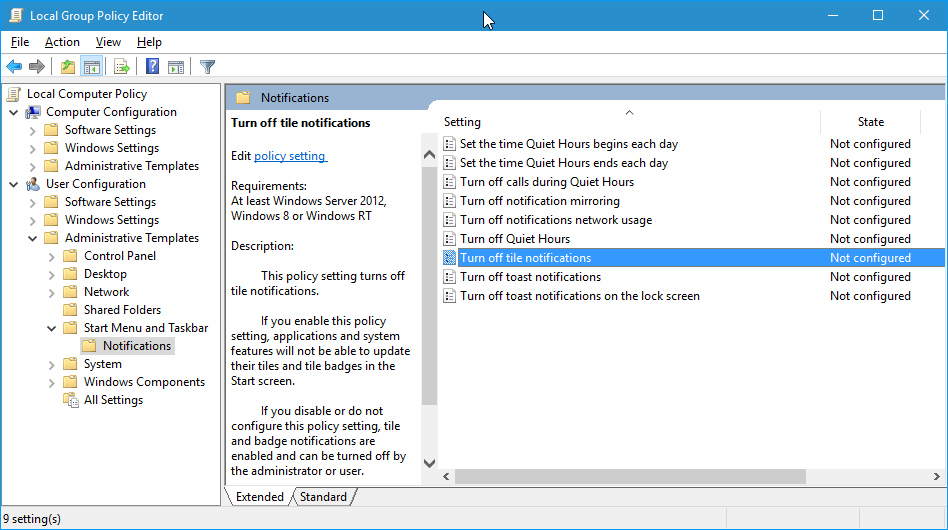
- Use the hierarchy on the left to navigate to the following policy group: Local Computer Policy > User Configuration > Administrative Templates > Star Menu and Taskbar > Notifications.
- There you find listed on the right Turn off tile notifications.
- Double-click the entry, and set it to enabled on the screen that opens.
- The effect? "If you enable this policy setting, applications and system features will not be able to update their tiles and tile badges in the Start screen."
While you are at it, you may want to consider disabling other notification options such as toast notifications or notification mirroring there as well.
Windows Registry
You can set the preference in the Windows Registry as well.
- Tap on the Windows-key, type regedit.exe and tap on enter.
- Confirm the UAC prompt that appears.
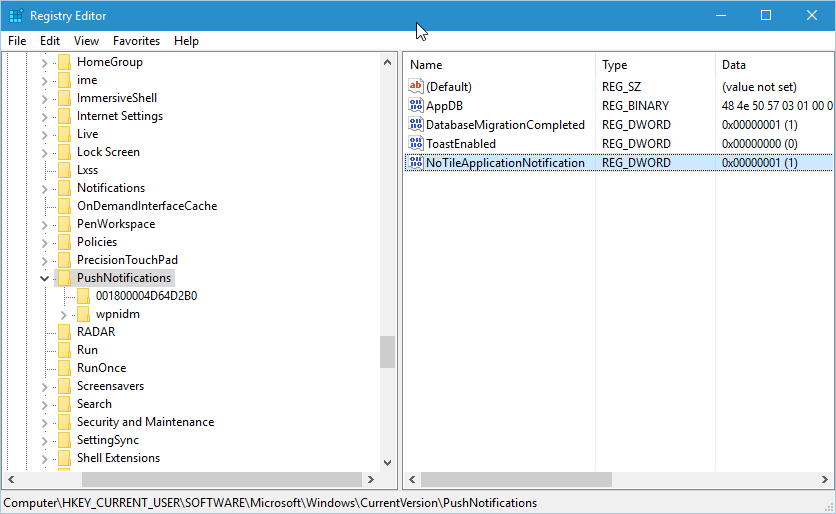
- Navigate to the following location: HKEY_CURRENT_USER\SOFTWARE\Policies\Microsoft\Windows\CurrentVersion\PushNotifications
- Right-click on PushNotifications and select New > Dword (32-bit) Value.
- Name it NoTileApplicationNotification.
- Double-click the item afterwards and set its value to 1.
Please note that items may still be cached even though push notifications are disabled.
Closing Words
The policy seems to take effect immediately, while the Registry key does not even after a restart. Anyway, both should be useful if you find no use in the Live Tile feature of Windows 10.
This article was first seen on ComTek's "TekBits" Technology News

- Log in to post comments