Disable the Windows 10 Lock Screen (Anniversary Update)
As you may know, Microsoft disabled some policies from working on Windows 10 Pro systems in the Anniversary Update.
Among the things that Windows 10 Pro admins cannot configure anymore is the lock screen behavior, or more precisely, the policy to turn off the lock screen.
While the lock screen may have its uses on some systems, it is just a delay for others who don't require its functionality and want the sign in done as quickly as possible.
Another reason why Windows 10 users may not want to see the lock screen is that Microsoft did use it to display ads (in form of wallpapers) in the past. While it is still possible to turn off lock screen ads in Windows 10's Anniversary Update edition, disabling the lock screen entirely cannot be done anymore using the Group Policy.
Good news is, there is still a method to turn off the lock screen in the latest version of Windows 10 (discovered on the Quarter of Three forum).
Disable the Windows 10 Lock Screen (Anniversary Update)
Update: Better Method that disables the Lock Screen completely (also on boot) (Thanks Glen)
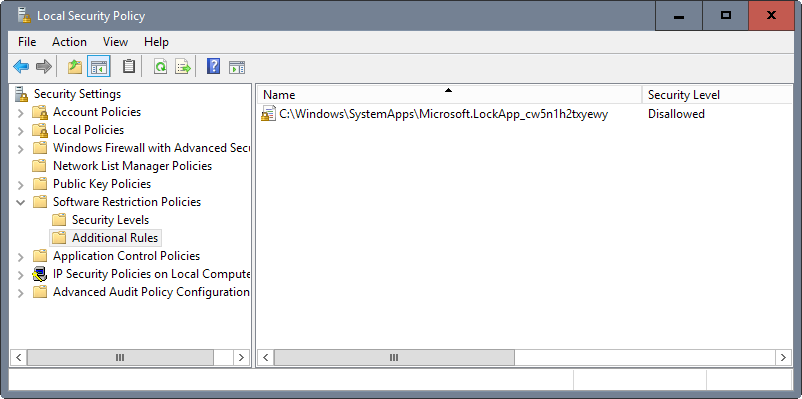
- Tap on the Windows-key, type Local Security Policy and open the item of the same name.
- Select Software Restriction Policies > Additional Rules.
- If you don't see the menu, select Action > New Software Restriction Policies to create it.
- Right-click on the right pane and select New Path Rule.
- Under Path, paste C:\Windows\SystemApps\Microsoft.LockApp_cw5n1h2txyewy
- Make sure the security level is set to Disallowed.
- Click ok.
Old Methods continued
The method below uses a Windows tasks for turning off the lock screen in the latest version of Windows 10. Please note that it will only take care of the lock screen when you lock the computer, but not on start.
It adds a key to the Registry that Windows seems to honor once only. That's why a task needs to be used and adding the key manually to the Registry won't make the fix permanent.
Step 1: Open the Windows Task Scheduler
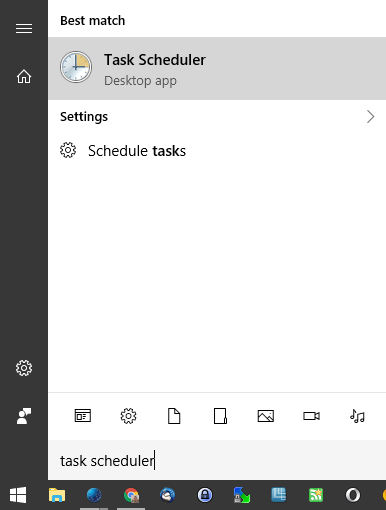
First step is to open the Windows Task Scheduler to add a new task to it. Tap on the Windows-key, type Task Scheduler and select the matching entry from the results.
Step 2: Creating the Task
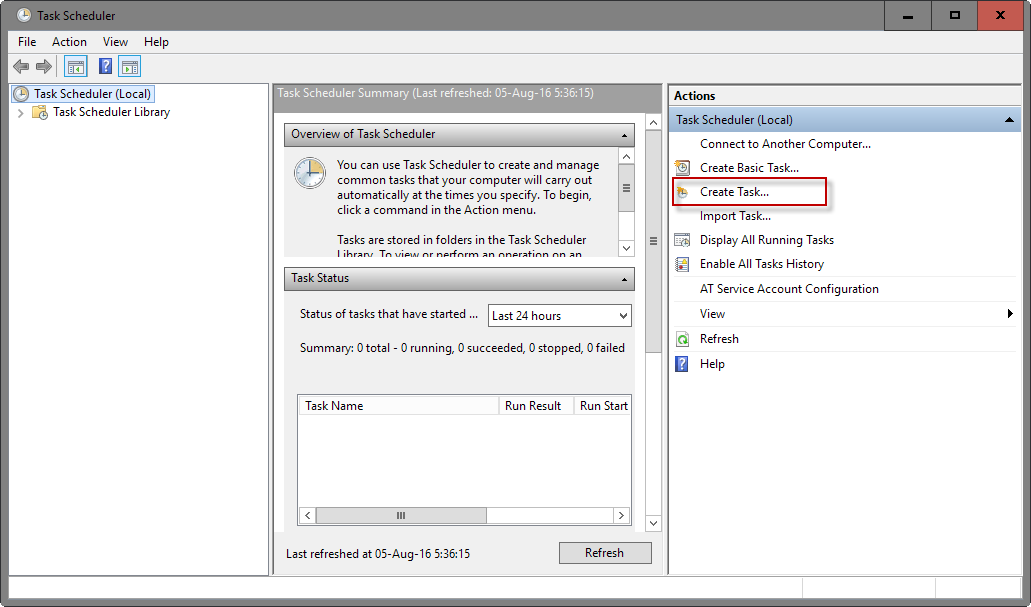
Click on Create Task under Actions on the right-sidebar of the Task Scheduler interface once it opens on the system.
Step 3: Disable Windows 10 Lock Screen: General Tab
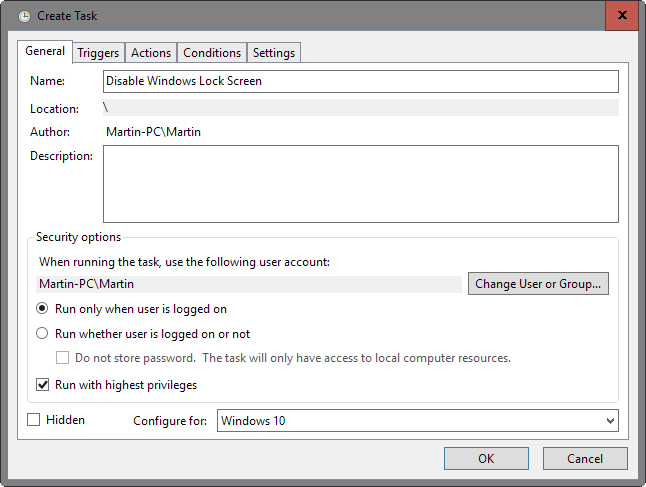
The first tab that opens is the general tab. Make the following adjustments on it:
- Name: Disable Windows Lock Screen.
- Check "Run with highest privileges".
- Configure for: Windows 10.
Step 4: Disable Windows 10 Lock Screen: Triggers Tab
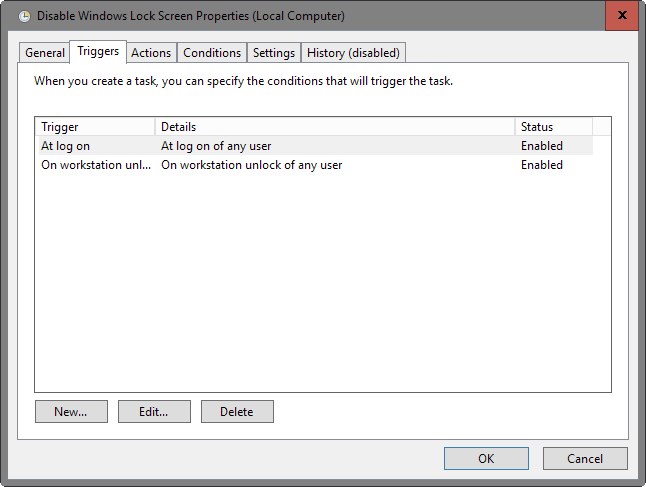
Add the following two triggers (one after the other) by switching to the Triggers tab and clicking on the new button.
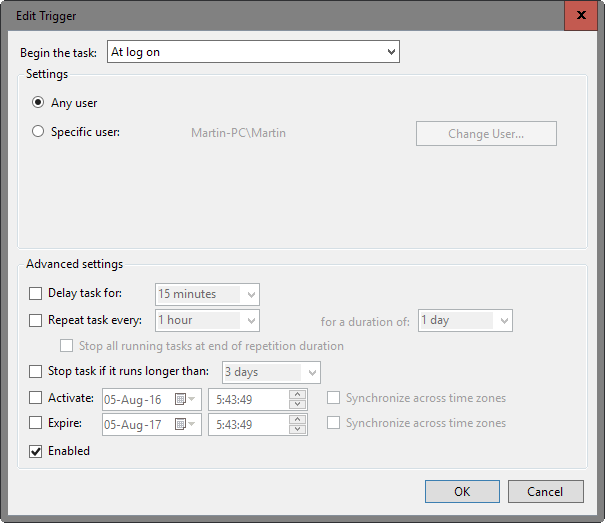
The only change you need to make is select the following parameters under "begin the task". Leave everything as is, and hit okay to save the trigger.
- First trigger: at log on
- Second trigger: on workstation unlock of any user
Step 5: Actions
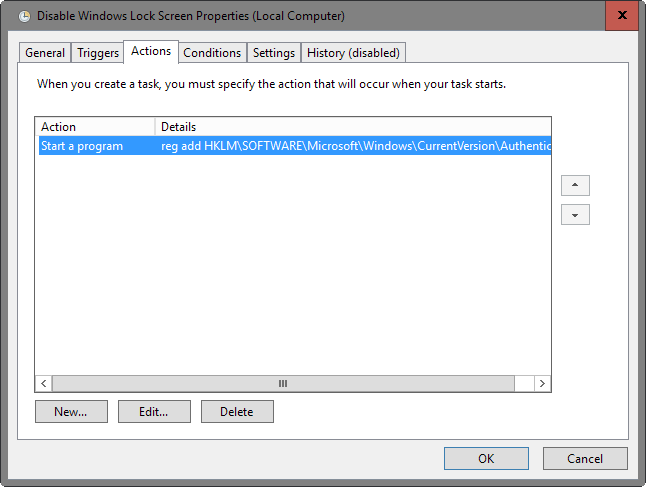
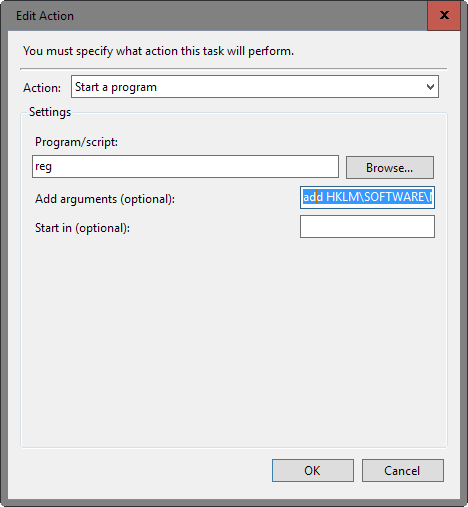
Open the Actions tab and click on the new button there.
Keep "start a program" selected there and add the following information to the settings fields:
- Program/script: reg
- Add arguments (optional): add HKLM\SOFTWARE\Microsoft\Windows\CurrentVersion\Authentication\LogonUI\SessionData /t REG_DWORD /v AllowLockScreen /d 0 /f
Click on ok to save the new action.
Testing
Once you have configured and added the new task, you may want to run tests to make sure it works correctly. The easiest way to do so is to use Windows-L to lock the desktop. You may also restart the PC if you prefer that to test that behavior as well.
You will notice that the lock screen is skipped automatically on log in again.
Update: Ghacks Reader Len White posted a solution in the comments that disables the Windows 10 Lockscreen completely. Please note that the published patch modifies the file C:\Windows\System32\LogonController.dll. We recommend that you back up the file before you run the patcher so that you can go back should the need arise.
Update: Check out this tool linked in the comments. It should do away with the lockscreen on Windows 10.
This article was first seen on ComTek's "TekBits" Technology News

- Log in to post comments